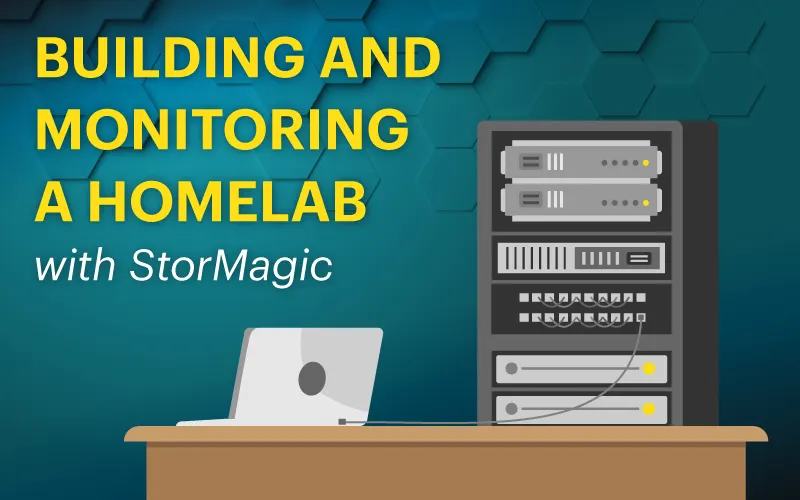
A homelab is more than just a place to tinker. It’s where IT professionals build real-world skills, test new ideas, and simulate infrastructure challenges in a safe, flexible environment. Whether you’re exploring virtualization, learning how to manage data storage, or preparing for edge deployments, a homelab is one of the most valuable tools you can have.
In this guide, we’ll walk through how to build and monitor a capable homelab using StorMagic SvSAN, StorMagic SvHCI, and StorMagic Edge Control. Each solution is built for simplicity, low resource requirements, and remote environments, making them ideal for labs with limited space and hardware.
Step #1 Start with a Purpose
The best homelabs start with clear goals. Before you install anything, take time to define what you’re trying to achieve. That focus will shape how you build, what tools you choose, and how you evaluate success.
Common goals might include:
- Learning how to set up shared storage and high availability
- Testing disaster recovery workflows
- Practicing virtual machine migrations and snapshot recovery
- Simulating edge computing or branch office environments
- Evaluating new platforms and alternative IT stacks
With a clear purpose, you’re less likely to overbuild and more likely to create something useful.
Step #2 Build a Homelab that Reflects Real-world Challenges
You don’t need a rack of enterprise gear to build a capable homelab setup. In many cases, smaller is better. A quiet, low-power setup that can run around the clock without draining electricity or taking up too much space is more than enough. What really matters is how well your lab reflects the infrastructure concepts you want to learn or test.
A reliable StorMagic-based homelab setup often starts with just two nodes and a few key components. For most users, a solid entry-level configuration might include:
- Two mini PCs or small-form-factor servers with 16 to 32 GB of RAM
- Solid-state or NVMe drives for faster I/O and smoother virtualization
- A gigabit switch to handle traffic between nodes
- An external SSD or NAS to test backup storage
- A basic UPS so you can simulate power interruptions safely
This kind of setup fits easily in a home office and is more than capable of running clustered virtual machines, testing failover scenarios, and simulating backup and restore workflows.
If you’re using VMware vSphere or Microsoft Hyper-V, StorMagic SvSAN adds shared storage by mirroring the internal drives of your two nodes. This gives you the ability to simulate high availability without needing a physical SAN. It is lightweight, efficient, and perfect for learning how storage mirroring and redundancy work in real environments.
If you want a full-stack solution where everything is managed in one place, StorMagic SvHCI includes compute, storage, and virtualization in a single platform. It simplifies the entire setup and gives you an experience that mirrors edge deployments or small-scale production environments.
These are the same workflows and challenges you’d face in a real IT environment. The difference is that you’re learning and refining your skills on your own terms. Whether you’re preparing for certifications, practicing edge deployment strategies, or just staying sharp, a StorMagic-powered homelab gives you the flexibility to experiment with available hardware and the tools to do it right.
Example 1: Using StorMagic SvSAN in Your Homelab
If you’re running a hypervisor like VMware vSphere, Microsoft Hyper-V, or Proxmox VE, StorMagic SvSAN is a smart way to add shared storage without bringing in external SAN hardware. It installs as a lightweight virtual appliance on each node and uses the internal disks already in your homelab servers to create a fully mirrored storage pool. This gives you the ability to test high availability and redundancy in a setup that’s compact, affordable, and easy to manage.
One of the biggest advantages of SvSAN in a homelab is how little it needs to run. With just 1 vCPU core and 1 GB of RAM per node, you can simulate real enterprise data storage behavior even on small-form-factor PCs or entry-level servers. That means you can focus on the architecture and workflows without needing expensive gear or heavy resource overhead.
In a lab setup with two nodes and a gigabit switch, SvSAN gives you a realistic platform to practice key skills like:
- Configuring shared storage across multiple hosts
- Setting up synchronous mirroring for data protection
- Running failover tests to understand what happens during a node outage
- Learning storage provisioning techniques such as thin provisioning and volume replication
You can simulate a full range of storage scenarios, from simple file server clusters to more advanced virtual machine failover, using just the hardware you already have. And because SvSAN is hypervisor agnostic, it fits right into the lab stack you’re comfortable with.
For anyone looking to understand how shared storage works in real environments, or preparing to manage infrastructure at the edge or in branch locations, SvSAN turns your homelab setup into a practical training ground. It’s straightforward to deploy and incredibly flexible, which makes it a go-to choice for labs that need to replicate real operational behaviors in a scaled-down environment.
Example 2: Using StorMagic SvHCI in Your Homelab
If you’re building your homelab from the ground up and want a solution that brings everything together in one place, StorMagic SvHCI is designed for that exact purpose. It delivers a complete hyperconverged infrastructure platform that combines compute, storage, and virtualization into a single integrated solution. You only need one node to get started, which makes it both accessible and practical for small-scale setups. When high availability features for VMs are needed, add a second node.
What makes SvHCI especially useful in a homelab is how much complexity it removes. You don’t need to install a separate hypervisor, configure external storage, or manage multiple interfaces. SvHCI handles it all in one streamlined platform, so you can focus on learning how real infrastructure operates rather than spending hours on manual configuration.
Once deployed, SvHCI gives you a unified environment where you can:
- Deploy and manage virtual machines
- Use built-in snapshots and replication for protection and recovery
- Monitor system health and performance from a central dashboard
- Simulate real HCI workflows in a lab-friendly environment
This kind of setup is perfect for IT professionals who want to understand how modern infrastructure works without needing a full datacenter or enterprise license stack. It is ideal for testing failover processes, backup strategies, patching workflows, and resource planning; all within a manageable footprint.
Whether you’re using your lab for skill development, proof-of-concept testing, or exploring new architectures, SvHCI keeps your environment clean and easy to control. It is also a great option for anyone preparing to deploy HCI in production and looking to validate the model beforehand.
Step #3 Monitor Your Homelab with Cloud-based Management Tool
Once your lab is up and running, monitoring becomes a critical part of the learning process. It’s not just about uptime. It’s about understanding how your systems behave, identifying performance issues, and validating alerts or automation.
StorMagic Edge Control is a centralized, cloud-based monitoring and management tool for both SvSAN and SvHCI environments. It provides deep visibility into system health and performance from a single, browser-based dashboard.
In a homelab, Edge Control lets you:
- Monitor CPU, memory, disk, and network usage across nodes
- Receive real-time alerts when thresholds are breached
- View cluster status and storage performance
- Track snapshot activity and replication health
Unlike other third-party tools, Edge Control is built for lightweight environments and doesn’t require complex integrations. It gives you insight into your infrastructure and helps you develop the same monitoring habits used in real IT operations.
Step #4 Create Simulations That Matter
Once you have SvSAN, SvHCI, and Edge Control running in your homelab, you’re in a great position to simulate the kinds of challenges IT teams face every day. These scenarios give you the chance to troubleshoot, recover, and optimize in a low-risk environment, using tools that reflect production environments. Here are a few examples of what these simulations might be.
Node Failure
A good place to start is simulating a node failure. Power off one node in your two-node cluster and see how your environment responds. With SvSAN, shared storage remains online through synchronous mirroring, so your workloads continue to access data. With SvHCI, virtual machines can fail over or restart automatically depending on your settings. This exercise helps you validate high availability and understand how well your environment can handle outages.
VM Snapshot
Next, try snapshot testing. Before applying system updates or configuration changes, take a snapshot of your virtual machine. If something goes wrong, roll it back to the previous state. This is an essential skill in any infrastructure role, and it lets you safely test upgrades or patches without losing progress.
Storage or Network Disruption
Another valuable scenario is testing how your system handles a storage or network disruption. Disconnect a drive or temporarily disable the network link between nodes. Watch how replication reacts, and monitor the alerts through Edge Control. This shows you how resilient your setup is and whether homelab monitoring is configured to detect these events.
Agent-based Backup
You can also run a full backup and restore test with your choice of agent-based backup solution, e.g., Veeam, Acronis, etc. Back up a VM to an external SSD or NAS, delete the original, then restore it from the backup. This kind of test confirms that your recovery process is not just configured, but fully functional. It’s easy to assume backups are working until the day you need them. This test removes the guesswork.
Other Outage Scenarios
With Edge Control, you can build out custom monitoring and alerting rules. Set thresholds for CPU usage, memory consumption, disk latency, or replication lag. Then, simulate those conditions and make sure alerts are triggered as expected. This helps you fine-tune visibility across your cluster and ensures you’re not caught off guard in a real outage.
As your lab matures, you can simulate more advanced scenarios, such as:
- Deploying resource-intensive workloads to test VM placement and performance
- Creating scheduled tasks to automate patching or service restarts
- Testing recovery time objectives by timing backup restores under load
- Running continuous replication or snapshot cycles to observe the performance impact
The goal of these exercises is to learn by doing. The more failure scenarios and recovery processes you test in your lab, the more confident and prepared you’ll be in production environments. Whether you’re using your lab for career development, edge infrastructure planning, or hands-on certification prep, these scenarios build the kind of operational knowledge that textbooks can’t provide.
Why It’s The Perfect Homelab for Edge Environments
One of the biggest advantages of using StorMagic in your homelab is that it’s designed to thrive in the same kinds of environments IT teams face every day. Whether you’re supporting a remote retail location with limited space or testing infrastructure in your lab, StorMagic brings the same simplicity, efficiency, and resilience to both.
The solutions are purpose-built for constrained environments where space, power, and IT resources are limited. That makes them a natural fit for edge deployments and an even better fit for labs that need to simulate them. They are:
- Lightweight enough to run on low-spec hardware
- Easy to install and manage without needing a large team
- Capable of delivering enterprise-grade features with a minimal footprint
This is especially valuable if you’re using your homelab to replicate distributed systems, explore hybrid cloud strategies, or practice deploying IT infrastructure outside of the traditional datacenter. You can test everything from shared storage and failover to remote management and monitoring, all from a compact two-node setup.
The same qualities that make StorMagic ideal for edge sites; reliability, efficiency, and simplicity, also make it the perfect foundation for any homelab setup focused on real-world IT challenges.
Build Purposefully, Monitor Effectively with Your Homelab
A homelab is a powerful platform for growth. With the right tools, you can test, break, rebuild, and learn without risk. SvSAN and SvHCI let you explore storage and virtualization from a hands-on perspective. Edge Control gives you full visibility, even when you’re working with limited hardware.
Whether you’re pursuing certifications, preparing for new job responsibilities, or just learning for the love of it, StorMagic helps you build a lab that reflects the infrastructure used in the real world.